At some point, you hold your phone up to the eyepiece and take a picture. The result is disappointing. You expected something close to what you saw — a crisp disc of Saturn with distinct rings. What you got looks like a blurry dot.
That's the moment astrophotography starts. Because now you know what the goal is.
Astrophotography is a separate hobby from visual observing. It uses different equipment, requires a different mindset, and produces results that are genuinely extraordinary — things you can't see with your eye at all, rendered in colour and detail by stacking hours of faint signal. It also has a very specific failure mode: spending money in the wrong order.
This guide is about getting the order right.
The mount is everything#
More than any other piece of advice in astrophotography, this one matters. In visual observing, a shaky mount is annoying. In astrophotography, it ruins every single image. You're stacking multiple 3–5 minute exposures — any tracking error produces star trails, and star trails can't be fixed in processing.
The golden rule: spend at least as much on the mount as on the telescope. Many experienced imagers spend more.
How a typical £1,500 / $1,900 astrophotography budget breaks down
10%
5%
Mount
~£600 / $760
HEQ5 Pro or equivalent. The non-negotiable foundation.
Telescope
~£380 / $480
Short APO refractor. f/6 or faster. ED or triplet glass.
Camera
~£300 / $380
Your existing DSLR to start. Dedicated AP cam later.
Guide setup
~£150 / $190
Mini guide scope + ASI120MM. Add after first sessions.
Accessories
~£70 / $90
Dew heater, intervalometer, flat panel.
The rule: If you're choosing between a better mount and a better telescope, choose the better mount every time. A modest scope on a great mount gives you usable images. A great scope on a poor mount gives you nothing.
The mount also has to be equatorial. Not just motorised — equatorial. An alt-az GoTo mount like the Celestron NexStar SE can track a planet for visual use, but it introduces field rotation during long exposures. This is not fixable. An equatorial mount tracks by rotating around an axis parallel to Earth's rotation, which keeps stars perfectly still. The Sky-Watcher HEQ5 Pro is the benchmark for entry-level AP mounts. Below it, tracking precision is generally not sufficient for 3+ minute subs.
Three types of astrophotography#
Before choosing any telescope, you need to know which of these you're actually trying to do. They need different equipment, different focal lengths, and different mounts.
Wide-field
Milky Way arches, large nebulae, star-forming regions. The most achievable entry point into astrophotography.
Best entry point for beginners
Deep-sky
The main gameNebulae, galaxies, clusters in detail. Multi-hour sessions. The reason most people get into AP.
What most of this guide covers
Planetary
Saturn's rings, Jupiter's cloud bands, lunar craters. Video-based lucky imaging. A different discipline entirely.
See our planets guide for planetary AP
Most people reading this want the middle option — deep-sky imaging of nebulae and galaxies. That's what the rest of this guide focuses on. If your goal is purely wide-field star fields and large nebulae, a star tracker and a short Petzval refractor like the William Optics RedCat 51 is a complete setup at a much lower entry cost. If you want to image planets, you need a different guide entirely — long focal lengths, video capture, and lucky imaging are the tools there.
Why refractors dominate imaging#
Reflectors and compound scopes have secondary mirrors. Secondary mirrors obstruct the light path, reduce contrast, and create diffraction spikes around bright stars — effects that are manageable visually but become more visible in processed images. A refractor has none of this. The light path is clean from lens to sensor, which is why nearly every serious AP setup at 70–120mm aperture is a refractor.
But not any refractor. The glass type matters enormously for imaging.
Achromat
Not suitable for deep-sky imaging
Two-element glass. Blue and purple halos appear around bright stars in exposures longer than a few seconds. Visible in even short subs and difficult to remove in processing. Fine for visual; wrong for AP.
e.g. most budget 80mm refractors, WO GT102
ED Doublet
Good for most astrophotography
Extra-low dispersion glass dramatically reduces chromatic aberration. Residual colour is present but minimal — easily managed in processing. The sweet spot for most budgets. Plenty of excellent results from ED doublets.
e.g. WO ZenithStar 61/73, SW Evostar 80ED
APO Triplet
Best for serious imaging
Three-element design with FPL-53 or FCD100 glass. Near-zero chromatic aberration. Stars render as clean white points across the field. Worth the price premium when you're ready to push integration times and output quality.
e.g. Askar 80PHQ, Askar 103APO, WO GT81
One more thing: even good APO glass doesn't automatically give you a flat field. Many imaging refractors need a dedicated field flattener (or reducer/flattener combo) to keep stars sharp in the corners of a large sensor. Some scopes — like the Askar 80PHQ — have one built in. Check before buying.
ED doublets are the sweet spot for most budgets. Triplet APOs eliminate residual colour almost entirely and are worth the price premium when you're pushing long integration times and printing results. Achromats — any refractor without ED or APO glass — are fine for visual work but produce halos that appear in even modest exposures.
One more variable: field flatness. Even a good APO will show curved stars in the corners of a large sensor without a field flattener. Some scopes — notably the Askar 80PHQ — have a flattener built into the quadruplet design. Others require a separate corrector that can add £100–£200 / $130–$250 to the budget.
What focal length do you need?#
Focal length determines your field of view and therefore what targets you can frame sensibly. A 250mm focal length fits the entire Milky Way arch into a single frame; a 670mm focal length is perfect for galaxies like Andromeda. Get this wrong and you'll either not be able to frame your target or have no detail in it.
| Target | 200–350mm e.g. RedCat 51 | 350–500mm e.g. ZS61, GT81 | 500–700mm e.g. 80PHQ, Evostar 80 | 700–1,000mm e.g. 103APO |
|---|---|---|---|---|
| Milky Way / large star fields | ✓ Good | ✓ Good | ◐ With caveats | ✗ Not ideal |
| Orion Nebula (M42) | ✓ Good | ✓ Good | ✓ Good | ◐ With caveats |
| Andromeda Galaxy (M31) | ◐ With caveats | ✓ Good | ✓ Good | ◐ With caveats |
| Horsehead / Flame (region) | ◐ With caveats | ✓ Good | ✓ Good | ✓ Good |
| Small / distant galaxies | ✗ Not ideal | ◐ With caveats | ✓ Good | ✓ Good |
| Planets | ✗ Not ideal | ✗ Not ideal | ✗ Not ideal | ◐ With caveats |
Most beginners do best starting in the 350–500mm range — wide enough to frame most popular targets, long enough to show meaningful detail. This is where the ZenithStar 61, Askar 80PHQ, and WO GT81 all live.
Our picks#
Organised by tier. There's no shame in starting at Tier 1 — some of the best astrophotos on Cloudy Nights come from compact wide-field rigs, not thousand-pound APOs.
Tier 1 — First step into imaging
William Optics RedCat 51
51mm f/4.9 · 250mm FL · Petzval design · built-in field flattener
A compact Petzval refractor purpose-built for wide-field imaging. Pinpoint stars across a full-frame sensor, edge to edge, with no additional corrector. The scope most people wish they'd bought first. Pairs perfectly with a star tracker for night one results.
Strengths
- ✓ Truly flat field — no flattener needed
- ✓ Compact and travel-friendly
- ✓ f/4.9 — shorter exposures than slower scopes
Watch out for
- ⚠ Vixen dovetail too narrow for some saddles — check fit
- ⚠ Minimal back focus — not suited for visual use
- ⚠ Canon adapters can have small amounts of play
Best for: wide-field Milky Way, large nebulae. Works on a star tracker — no full EQ mount needed.
William Optics ZenithStar 61
61mm f/5.9 · 360mm FL · ED doublet
A well-regarded 61mm ED doublet that works equally well for visual and imaging. Pair with a field flattener for serious AP work. Owners on Cloudy Nights consistently report sharp, colour-accurate stars and solid build quality for the price.
Strengths
- ✓ Doubles as a capable visual scope
- ✓ Compact and lightweight
- ✓ Strong community support and strong resale
Watch out for
- ⚠ Focuser compression ring deforms — upgrade to Baader Click-Lock
- ⚠ Needs a separate flattener for wide sensors
- ⚠ Small aperture means longer integrations
Best for: the beginner who wants to observe visually and image with the same scope.
Tier 2 — The serious starter
William Optics GT81
81mm f/5.9 · 478mm FL · APO triplet
A fast flat-field APO built for imaging. CN owners describe exceptional wide-field results for Milky Way arches and large nebula complexes. Note: some owners report characteristic diffraction spikes from the lens cell at extreme contrast — worth knowing before you buy.
Best for: wide-field to mid-range targets on an HEQ5 Pro.
Askar 80PHQ
80mm f/5.6 · 448mm FL · APO quadruplet
A fast quadruplet APO with a built-in field flattener — no additional corrector needed. Owners report excellent contrast on nebulae and clean stars across the frame. The 80mm aperture requires longer integrations on faint targets, but the simplified setup makes it the right call for most beginners.
Best for: the serious beginner who wants to skip the flattener question and start imaging.
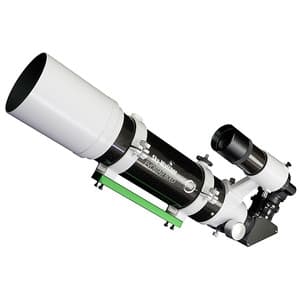
SW Evostar 80ED + HEQ5 Pro
80mm f/7.5 · 600mm FL · ED doublet + HEQ5 mount
The classic combination recommended by the AP community for newcomers. Sold as a bundle by most retailers. The HEQ5 Pro is the benchmark mount at this price; the Evostar 80ED has a huge user base and plenty of help online.
Best for: the buy-once-buy-right approach to a starter AP rig.
Tier 3 — Advanced and specialist
Askar 103APO
103mm f/6.5 · 670mm FL · APO triplet
The step up when 80mm isn't gathering enough light. More aperture means shorter integration times on faint targets and finer detail in galaxy structure. CN community data confirms it's well-regarded for both broadband and narrowband imaging. An EQ6-R Pro is the right mount pairing at this level.
Best for: experienced imagers ready to push integration time and resolution.
Celestron RASA 8
203mm f/2 · 400mm FL · Rowe-Ackermann Schmidt Astrograph
An imaging-only system. f/2 means exposure times roughly a quarter of a typical APO — the same result in a fraction of the time. The camera mounts at the front of the tube, eliminating secondary obstruction. No visual use, no eyepiece port. For those ready to commit fully to imaging.
⚠ Imaging only — no eyepiece port. Not a scope to ease into.
A few notes from the community data:
The RedCat 51 delivers optical performance that owners consistently compare favourably to high-end camera lenses in the 200–300mm range. The fit and finish is excellent. The known issues are mechanical, not optical — the Vixen dovetail is slightly undersized for some saddles (an ADM dovetail bar fixes this) and the Canon adapter has a small amount of play (check your adapter before imaging). Neither is a dealbreaker.
The Askar 80PHQ is well-regarded by the EAA and imaging community for optical quality and portability. The built-in field flattener is a genuine advantage for beginners. A recurring note in owner reports: dust bunnies can appear in the optical path during long sessions, and they can move between frames — something to monitor during calibration. The 80mm aperture is the one trade-off: faint outer galaxy structure requires significantly longer integration times than a larger aperture would.
The WO GT81 delivers exceptional corner-to-corner field flatness and has an integrated flattener. The caveat worth knowing: the lens cell design produces 6–8 diffraction spikes from the adjustment screw tips, which the manufacturer confirms is by design. Most owners find this acceptable or even add character to star images; some find it objectionable at extreme contrast. The community verdict is otherwise strongly positive.
The Askar 103APO requires careful attention to spacer configuration to achieve focus with certain camera and reducer combinations — this isn't unusual for serious imaging refractors, but it's worth factoring in setup complexity. Once dialled in, it's a highly capable imaging platform for narrowband and broadband work at a focal length that suits compact to medium galaxies well.
Build your setup#
Answer three questions to get a recommended scope and mount combination for your budget and goals.
AP Setup Builder
Answer three questions and get a recommended scope + mount combination.
What's your total budget for scope + mount?
Camera and accessories are separate. This is just for the optical tube and tracking platform.
The full cost reality#
The telescope is one line item. Here's what a complete imaging setup actually costs across three levels — including what you need on night one and what you can add later.
| Component | Entry ~£700–£900 / $900–$1,140 | Mid ~£1,700–£2,200 / $2,160–$2,800 | Serious ~£3,200–£5,000 / $4,060–$6,350 |
|---|---|---|---|
| Mount ⭐ | SW Star Adventurer 2i ~£280 / $360 | Sky-Watcher HEQ5 Pro ~£700 / $890 | Sky-Watcher EQ6-R Pro ~£1,400 / $1,780 |
| Telescope | RedCat 51 or ZenithStar 61 ~£380–£500 / $480–$640 | Askar 80PHQ or WO GT81 ~£450–£600 / $570–$760 | Askar 103APO or RASA 8 ~£800–£1,400 / $1,015–$1,780 |
| Camera | Your existing DSLR £0 to start | Modified DSLR or ASI533MC ~£300–£500 / $380–$640 | Cooled mono AP camera ~£800–£1,500 / $1,015–$1,905 |
| Guiding | Not required yet | 50mm guide scope + ASI120MM ~£120–£180 / $150–$230 | OAG + guide camera ~£250–£400 / $320–$510 |
| Software | Siril (free) + PixInsight trial | Siril + PixInsight ~£270 / $340 one-off | PixInsight + plugins ~£350+ / $445+ |
| Realistic total | ~£660–£780 / $840–$1,000 (existing DSLR, free software) | ~£1,840–£2,250 / $2,340–$2,860 | ~£3,600–£5,450 / $4,570–$6,925 |
⭐ Mount is highlighted — it's the single biggest budget decision and the hardest to undo.
The most common mistake is underbudgeting the mount and overbudgeting the telescope. A £250 mount will undermine a £600 scope. The reverse isn't true — a modest scope on a great mount can still produce excellent images, and you can upgrade the optical tube later without touching the rest of the setup.
Software is often forgotten until the first night of data sits unusable on a hard drive. Siril is free and covers the full workflow from calibration to stacked image. PixInsight (around £270 / $340 as a one-off licence) is the community standard for serious processing and worth the investment once you've outgrown Siril's toolset. Both have extensive tutorial libraries — budget a few evenings of learning alongside your first imaging sessions.
What to avoid#
Achromatic refractors for deep-sky
Any refractor without ED or APO glass will produce coloured halos around bright stars in long exposures. This isn't fixable in processing. Most budget 80mm refractors are in this category. Fine for visual — wrong for deep-sky imaging.
Any mount with less than 10kg payload
Manufacturer payload ratings are optimistic. Imaging with a camera, guide scope, and accessories adds 30–40% to the stated load. An EQ5 rated at 10kg is not suitable for serious imaging. The HEQ5 Pro at 13.7kg payload is the practical minimum for a realistic AP setup.
A visual GoTo mount for AP
GoTo and equatorial tracking are not the same thing. The NexStar SE series has GoTo — on an alt-az mount. Alt-az mounts introduce field rotation during long exposures. Only equatorial mounts can track the sky accurately enough for exposures beyond 30 seconds. Don't confuse the two.
Starting with an SCT for imaging
SCTs like the EdgeHD series are excellent visual scopes but demanding first imaging scopes. Long focal length (2,000mm+) means a tiny field of view, very unforgiving polar alignment, and a slower f/ratio requiring longer exposures. Start with a short APO refractor, then add a long focal length scope when you know what you're doing.
There's also a broader pattern worth naming: the instinct to buy the most impressive-sounding telescope first and worry about the mount later. It's the wrong order. The mount is the foundation everything else sits on. Buy that first, and the rest of the setup can be upgraded incrementally as your skills develop.
A note on smart telescopes#
If what you actually want is astrophotos without the learning curve, smart telescopes like the ZWO Seestar S50 are a legitimate alternative. They handle alignment, stacking, and processing automatically — producing shareable images in 20 minutes rather than 20 hours. The trade-off is smaller aperture, phone-based workflow, and less control over the result. For some people that's exactly the right call. For details, see our Best Smart Telescopes guide.